Lesson .
.Design a Crew Exploration Vehicle
Overview
Using the engineering design process, students will design, build, test and improve a crew exploration vehicle capable of carrying two 2-centimeter-tall "passengers" and floating in water for one minute without leaking.
Materials
- Design a CEV Challenge Worksheet - Download PDF
- Plastic tubs for splashdown tests (plastic shoeboxes, dishpans, etc.)
- Towels (paper or cloth)
- Non-permanent ink pens
- Supplies for building the Crew Exploration Vehicle (CEV):
- Cotton balls
- Cardboard
- Cardstock (index cards)
- Sheets of paper
- Popsicle sticks
- Tape (transparent, masking, duct, etc.)
- Plastic sandwich bags
- Plastic stretch wrap
- Various other craft and building supplies, as desired
Management
- The water test should be conducted in a space where water can spill, as there will likely be drips when the craft lands or is removed.
- Having multiple water bins will speed up the testing process by allowing multiple groups to test their CEVs simultaneously.
- Placing towels under the bins will help minimize water spreading on the floor or tables.
- Because some spacecraft may fail the float test, it is important to have additional materials available for students to rebuild their CEVs with dry materials.
Background


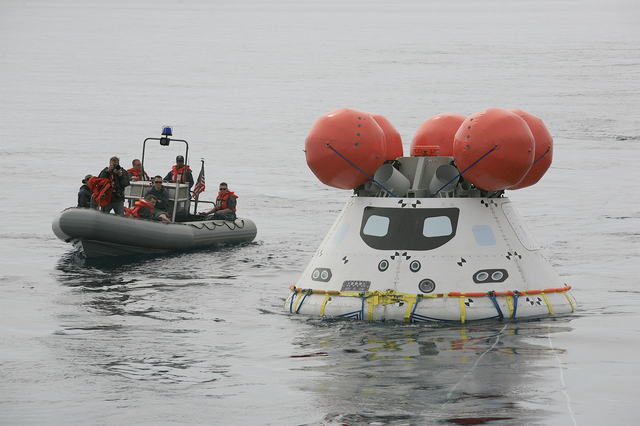
During the early days of human space flight, NASA relied on ocean landings, called splashdowns, to return crews safely back to Earth. The ocean provided a softer landing surface than land and allowed crew exploration vehicles, or CEVs, to be built without the rockets required for returning on land. This saved time in the design process as well as money and weight when the crew vehicles were built.
The advantages of landing in water do come with some drawbacks. The ocean is large and the capsule, once landed, is subject to ocean currents and winds. In 1961, a problem with the hatch on Gus Grissom’s Liberty Bell 7 capsule caused the vehicle to fill with water and eventually sink. Luckily, Grissom was able to get out and was rescued. When Scott Carpenter landed during the Mercury Project in 1962, he was off course. Carpenter missed his landing site by more than 250 miles and had to float in his capsule for several hours while rescuers searched the Atlantic Ocean.
For 30 years, NASA's Space Shuttle program relied on reusable spacecraft that touched down like an airplane on landing. When the Space Shuttle program was retired, NASA began developing a new crew exploration vehicle that will once again land crews of astronauts on water. A water landing means cost and mass savings, as well as a less complex design for the vehicle, which is designed to take humans to Mars.
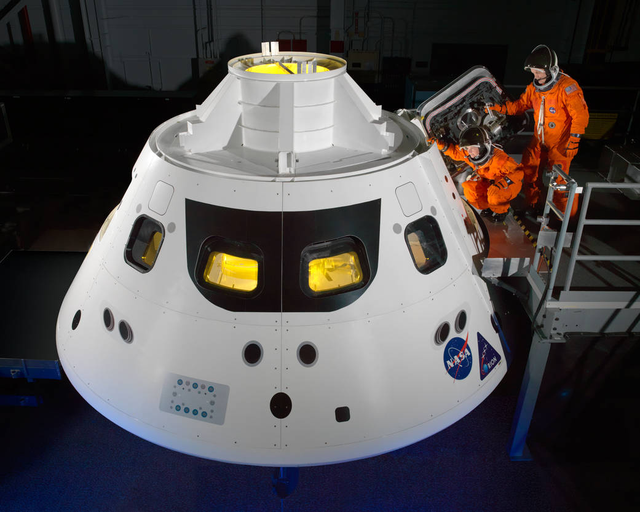
NASA's Orion Multipurpose Crew Vehicle is designed to ride atop the agency's Space Launch System, or SLS, a new heavy-lift rocket in development. An Orion crew vehicle has already been tested in flight and another will be tested once more on SLS’s first launch. During the second SLS launch, Orion will carry a crew on board. Even though this will only be the third space flight for Orion, thousands of tests will have been conducted on Earth to ensure astronaut safety, including water-landing tests!
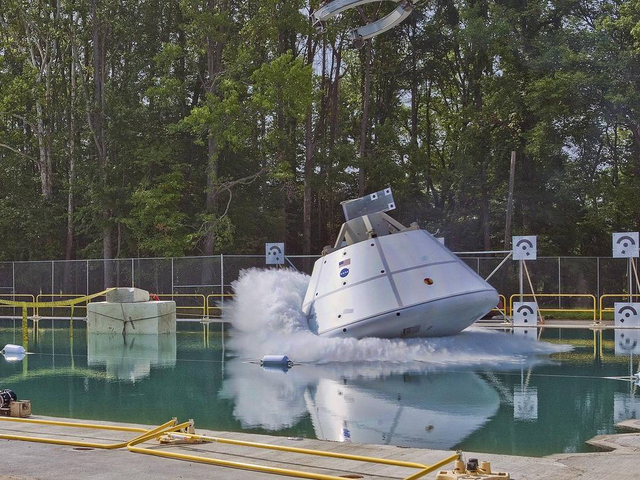
Many of NASA's water-landing tests occur at the Hydro Impact Basin at the agency's Langley Research Center. The tests are designed to see how the capsule will perform in different scenarios. Variables that are tested include speed, approach angle and capsule angle. Test dummies inside the capsule are loaded with sensors to help scientists and engineers understand how astronauts will be affected by different landing scenarios.
Procedures
Have students watch an animation of Orion’s Exploration Flight Test 1 to learn about the vehicle. To provide students with more background about the test flight, visit the Orion Exploration Flight 1 page or the Fact Sheet.
Share with students how NASA has tested the Orion Multipurpose Crew Vehicle, or MPCV, to better understand what happens to the capsule and astronauts during splashdown. For more information about splashdown tests, go here.
Have students watch the Orion Model Vertical Splash Test and Orion Space Capsule Drop Test, Part II to help them get an understanding of how water landing tests are carried out. Introduce students to the challenge.
Lead a discussion about the importance of building a crew exploration vehicle capable of landing in water and not leaking over a period of time. Give the example of Scott Carpenter's 1962 splashdown.
Introduce the challenge and distribute the challenge worksheet. As a class, students will discuss the criteria for success and the limiting constraints. In their groups, they should brainstorm ideas for how to accomplish the goal set forth in the challenge.
Balance and center of mass
Total mass
Waterproofing techniques
Vehicle egress
Students should determine which idea(s) they will incorporate into their design and sketch what their design will look like.
Using the materials provided, have students build the CEV based on their design.
Have each team drop the CEV in the water basin from a height of approximately 61 cm (about 2 feet) to test its ability to remain upright, float and keep water from entering. Students will test the CEV three times, for one minute per test. If available, students can use a mobile device to make a slow-motion recording of the drop to view what might otherwise happen too quickly to see during the test. This can clue students into what happens during the test, showing what is working as expected and why failures might be occurring.
After each float test, students should examine the CEV. Have them inspect the interior for moisture. There may not be pools of water, so students should also look for other signs of moisture. During construction, students should mark the bottom of the interior of the capsule with several straight lines from a non-permanent ink pen. Wet paper will warp and the moisture will cause the ink to run, indicating a leak.
The following guiding questions can be used to evaluate the design performance after each test.
Did the CEV float?
Did the CEV remain upright?
Did the interior of the CEV remain dry?
Did the hatch remain closed?
What worked as expected?
What unexpected things happened during or at the end of the drop, or during the float?
Students should assess what didn’t work and think about changes that can be made to the design. They should also look at what worked in the design and determine if changes can or should be made to improve performance. It’s important that students make only one change at a time. This allows them to test that single variable in the design. If multiple changes are made, there is no way to know for sure which change in the design resulted in a change in performance.
After making changes to their design, students should return to Step 8. The Test, Evaluate, Improve, Retest cycle can be repeated as many times as is necessary or practical to develop a design that meets the criteria for success in the design challenge.
Discussion
- What was the greatest challenge for your team today?
- Why was it important that the hatch stay closed during the drop tests?
Assessment
Refer to the engineering rubric.
Lesson Last Updated: Oct. 11, 2024
