Classroom Activity
Parachute Design


This activity is part of our Engineering in the Classroom tool for educators! Click to learn more about the Next Generation Science Standards (NGSS) for engineering, make connections to NASA and discover more standards-aligned activities.
Overview
Sending larger vehicles to Mars might seem pretty far removed from the classroom, but this lesson allows you to bring it right onto students’ desks! In Parachute Design students will design and test parachute landing systems to successfully land a probe on target. After testing, students can optimize their parachutes by experimenting with different materials and shapes for their parachute designs. Students will then retest their designs to see if the changes they made resulted in improved performance. The goal is to land a payload as slowly and softly as possible.
Materials
Management
- Suggested team size: two to three students
- After the completion of the parachutes, they should be dropped from an elevated area, such as a staircase for the student to stand on, or a second story balcony. In a pinch, the school stage can be used, but a greater drop distance is preferred. Closely supervise students on elevated surfaces at all times.
- Be sure all groups use payloads of the same weight to eliminate inducing a variable.
- This activity works best on a non-windy day. High winds will carry parachutes away from the target landing area and data will be difficult to collect.
Safety
- Get permission before dropping objects from second stories. Supervise students who may be dropping their parachutes from a second story.
- Be sure payloads have no sharp points on them.
- Clear the landing area of people. Do not allow anyone to attempt to catch a falling parachute.
Tips for Remote Instruction
- Encourage students to use any materials they can find around the house to create their parachute. They can use newspaper, paper towels, tissue paper, lightweight fabric, or plastic grocery or trash bags. Also, this activity can be done without string by taping the corners of the parachute directly to the payload.
Background
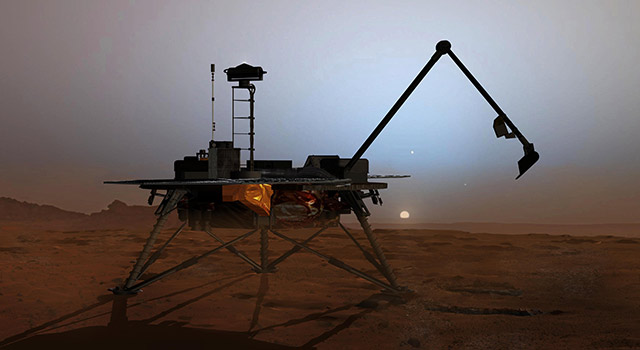
When NASA lands a spacecraft on another planet or object in our solar system, it is important to have a soft landing so the spacecraft is not damaged on impact. When humans are on board, it's even more important to have a soft landing. The larger and more massive the spacecraft, the more difficult it is to achieve a soft landing.
In an effort to land larger and more massive objects on Mars, NASA has tested a variety of parachutes as part of the Low-Density Supersonic Decelerator project, or LDSD. LDSD uses a large parachute–the largest ever used–to help slow the landing vehicle. The video below describes one of the difficulties of testing such a large parachute that will not fit in any wind tunnel–and NASA has a wind tunnel as large as a football field!
Procedures
- Introduce the activity by showing images of NASA parachutes and showing the LDSD video above.
- Discuss how a parachute works, showing a teacher-created model. The parachute catches air and creates drag, slowing the descent of the payload.
- Discuss the reason NASA wants to land spacecraft softly (as opposed to a hard landing). Explain that parachutes are one technology that help NASA land spacecraft softly.
- Explain that the students are going to be working together in teams to build and test different parachute designs to see which one will create the softest landing for the payload.
- Show students the chosen payload (plastic toys, unsharpened pencil, etc.).
- Show students the test area. Explain where the parachutes will be dropped from and where they are expected to land.
- Show students the materials from which they will make their parachutes.
- Give each group a large square napkin, four pieces of string, tape and a payload.
- Tell students that sometimes parachutes are square, round, rectangular or other shapes. The first one we make will be square.
- Instruct (and model for) students to open their napkin all the way so it is a large square, and lay it flat on the table.
- Instruct students to use tape to attach one end of each of the pieces of string to a corner of the napkin.
- Instruct students to bring the four loose ends of the strings together and tape them to the payload so the payload is centered under the parachute. The parachute is now ready for testing.
- Proceed to the test area. Take student parachutes and a notepad to record drop times.
- Clear the landing site of people.
- Model for the students, using the teacher-designed parachute, how to safely drop test their parachutes.
- Practice timing the drop of the teacher-designed parachute, either with a stopwatch, or by having the class count off using a non-standard time measurement such as "One Mississippi, two Mississippi, ..."
- Remind students that the goal is to land as slowly and softly as possible, so we are going to note how long their first parachute takes to land the payload so we can compare it to the performance of their next parachute design.
- Have each student team perform their parachute drop test while the class times the drop. Record the drop times.
- Return to the classroom and discuss any variation in drop times that occurred. Why did parachutes that looked very similar perform differently? (Hints: Perhaps wind interfered, timing was imprecise or the parachutes weren't exactly the same.)
- Challenge student teams to brainstorm ideas and draw a picture of a better parachute design. Instruct them to discuss in their teams which of the available materials they would like to use for their new parachute. Remind them that the goal is to descend slowly and provide a soft landing for the payload.
- Approve student designs for safety and then allow students to construct their new parachute.
- Repeat the drop tests and timing.
- Return to the classroom and discuss parachute performance. Have teams share their findings with the class -- whether their parachute design performed better or worse than the initial design -- as both are valuable feedback in the engineering design process.
- Challenge students to use what they've learned and design a third parachute.
- Approve student designs for safety and allow students to construct their third parachute.
- Repeat the drop tests and timing.
- Return to the classroom and discuss parachute performance.
- Use the data from the parachute drop tests to create a class graph that represents the timing data.
- Ask students to think about what materials they might use that aren't available in the classroom. What might make a better parachute?
Discussion
- After the construction and test of the students' first parachutes, ask which ones worked better and discuss the reasons why. Possible reasons include size and shape, but usually are related to surface area.
- Encourage students to use geometry vocabulary (square, rectangle, triangle, circle, etc.) in describing their parachutes.
- Research: In addition to spacecraft, where else are parachutes used?
Assessment
Successful completion of this activity involves:
- Working together with teammates to complete a directed task
- Working together with teammates to create a new design
- Conducting oneself safely in a test environment
- Engaging in the engineering design process to attempt to build a better parachute by comparing the strengths and weaknesses of parachute performance during test.
It is important to note that as much can be learned from failures as from successes during the engineering design process. The important things to encourage are experimentation, examining results and genuine attempts to improve design.
Encourage student creativity - let them try some "crazy" ideas (as long as they are safe). Sometimes, design ideas that seem like they will not work perform amazingly well.
Refer to the engineering rubric.Extensions
Raise the stakes! Challenge students to safely land an egg without breaking it, using only a parachute (no padding!).